

How To Clean Up A Scanned Drawing In Photoshop
When I started working with Photoshop, my main difficulty was to get a nice clean line with a transparent background to work with. I remember spending hours and hours erasing every little bit of white background, every little misplaced pixel that would bother me.
Nowadays, I do this very quickly so I can spend my valuable time on more important steps. If you are a beginner in Photoshop, this article might be of interest to you.
I know that there are other ways to get to the same result and there are loads of tutorials out there. This is the way that works best for me, and it might work for you too.
For this tutorial, I'm using a black and white illustration that I did for Women's History Month for The Puddlejump Collective, which I am a member of. Whether your image is a mess of pencil lines or a neatly inked line art, the process is the same.

- The first step is to scan your drawing. On my scanner, the default setting is a quick standard quality scan, so I set it up for a higher quality one, at least 300dpi.
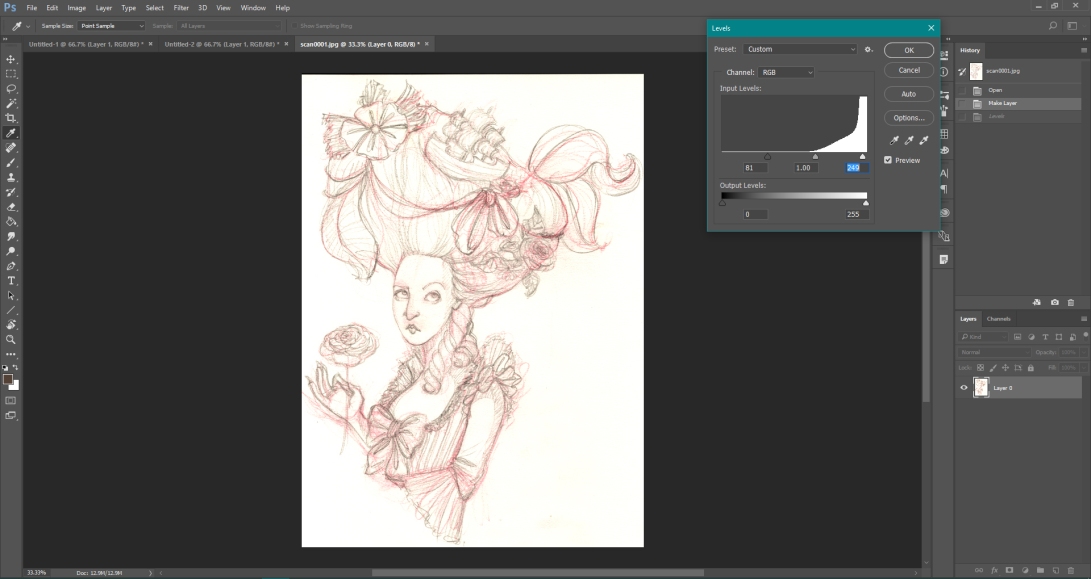
- You then open it in Photoshop (I have the CC version but I'm nearly sure you can do this in older versions too). As you can see, the contrast is very poor so we need to make the line darker. Double click on the layer called background to change it into a layer.

- Then click on Image -> Adjustments -> Levels.

- Play with the Input Levels sliders in order to make the black lines that you want to keep darker and the dirty grey-ish areas that you want to remove lighter. Focus on the black and white sliders, not as much on the grey one. Be careful because this is where you can mess things up: push the dark too much and you'll end up with inelegant dramatic black lines. Push the white too much and you'll lose some lines or shading. Obviously with an inked drawing, this step is much more straightforward.
- Next, go the Channels tab, beside the Layers, and select the Color Channel which shows the best line work. Here I picked the red one, because it removed all the red sketch lines that I didn't want to keep. Select the line work by clicking Ctrl + the channel thumbnail.

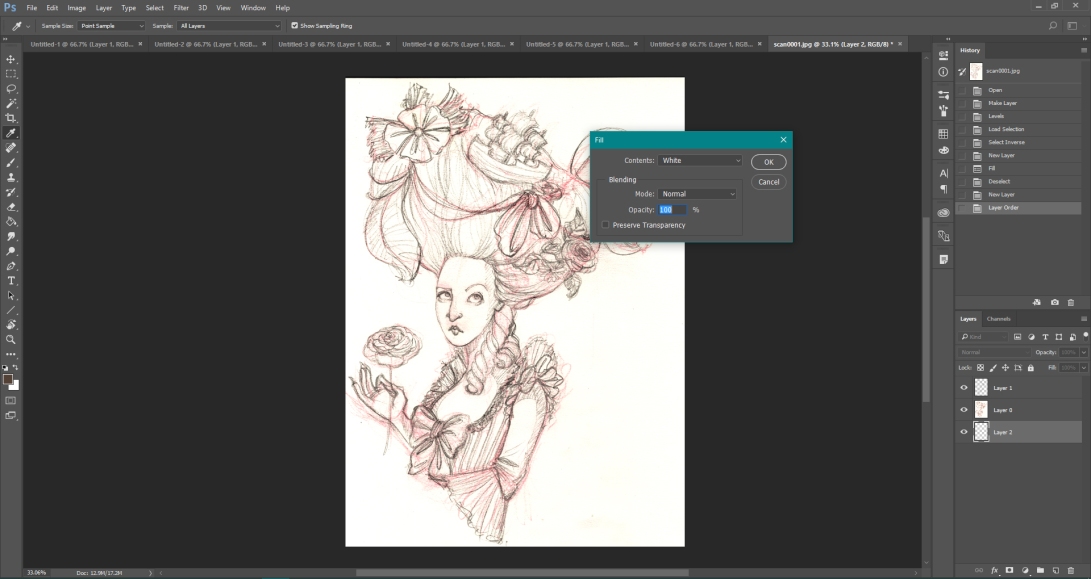
- Go back to the Layers tab and click on Select -> Inverse. Then click on the symbol to create a new layer, at the bottom of the Layers tab. When you are on this new layer, click Edit -> Fill.

- A new window opens. Select Contents -> Black (you can experiment here by picking a different color for your line work)

- We have now created a layer with the line work only. So let's create a new layer for the background. Click on the symbol at the bottom of the Layers tab again and this time fill the whole layer with white: Edit -> Fill and then Contents -> White. Again, you can chose a different color for your background if it suits you.
- Remove Layer visibility for the layer with your scan by clicking on the little eye beside it. At this stage, you might find that your line work is a bit light. To fix this, right-click on the layer and select Duplicate layer. Do this as many times as you need and merge all the line layers in one layer (select them all, right-click and select Merge layers).
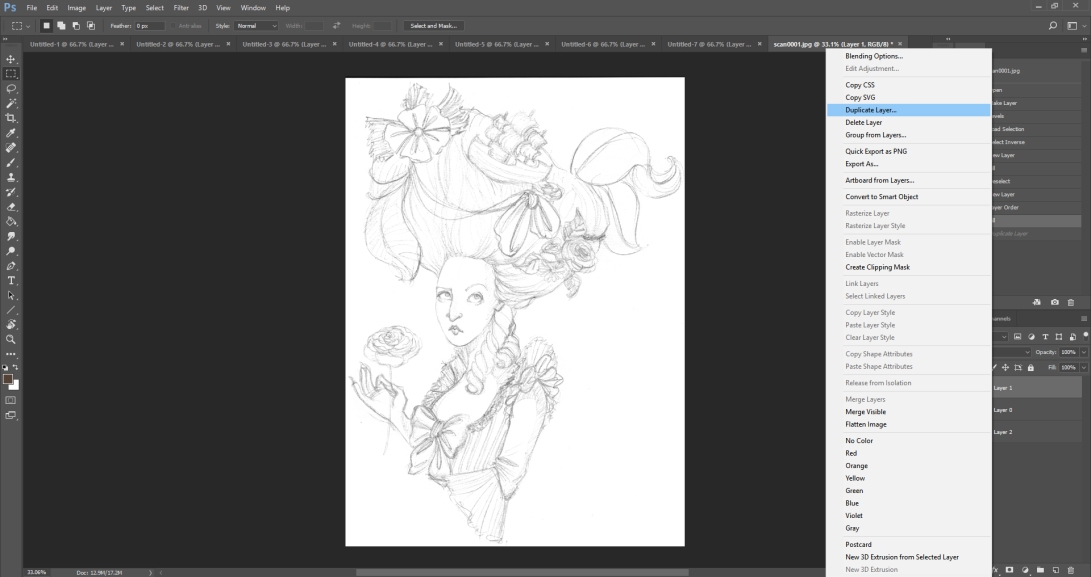
- And that's it! You end up with 3 layers: the background, the initial scan (invisible, you may delete this layer if you want), and your line work. Rename them to make things clearer. Create a new layer, place it underneath your line work layer and start colouring!

Or if you want to do like I did for the final illustration, reduce the opacity of your line work and print it. You can then ink on top of these very faint lines. Here is the final version:

If something is not clear with my tutorial or you need more information, don't hesitate to ask in the comments!
How To Clean Up A Scanned Drawing In Photoshop
Source: https://audreydowling.com/2017/03/09/how-to-clean-your-line-drawing-in-photoshop/
Posted by: boedingtorned1980.blogspot.com
0 Response to "How To Clean Up A Scanned Drawing In Photoshop"
Post a Comment