

How To Do A Draw Test With A Multimeter
Our editors pick the products & services nosotros write about. When you buy through our links, we may get a commission. Learn more.
Later on a weekend of enjoying leisure time at home, Monday morning time has arrived yet again. Y'all slide backside the steering bike of your vehicle and prepare to crank the engine to head to piece of work like any other twenty-four hour period. However, today is different. Absent-minded is the sound of your engine firing and settling into its usual smooth idle.
This forenoon you plow your fundamental just to exist met with no response. Only how could this be? Your car has been a reliable companion day in and 24-hour interval out, only to leave you hanging subsequently sitting for the duration of the weekend. If this is the case, you could very possibly be dealing with a instance of a parasitic depict.
What is a parasitic depict?
A parasitic draw is characterized equally a slow depict of current from your vehicle's battery on behalf of an accessory. Or another component is even when the machine is shut off, and the item component is not intentionally used.
This consumption of electricity robs your battery of its standard level of charge. This constant draw becomes evident when your vehicle is non in use, thus rendering your vehicle'southward alternator unable to generate a level of charge that would overcome such a draw.
Symptoms of parasitic draw
A vehicle owner often does not get aware of the presence of a parasitic draw until their vehicle does not start as expected on a given morning time. The car will usually creepo as expected when the duration of time between uses is relatively minimal. However, during prolonged sitting, such as overnight or throughout a weekend, the vehicle in question exhibits cranking issues. The most common symptoms of a parasitic draw are a no crank or dull crank condition.

How to examination for parasitic depict
If you doubtable that your vehicle is exhibiting signs of a parasitic draw condition, you must verify that your assumption is correct utilizing accurate testing. Nevertheless, like any other diagnosis, the proper pick of tools and other needed equipment is of vast importance.
- Battery Charger,
- Battery Tester,
- Digital Multimeter (Capable Of Checking In Amp Scale),
- Quality Multimeter Leads (Clamp Style Leads Highly Recommended),
- Wrenches (Of Specific Size To Remove Battery Cables).
Verifying parasitic draw
The steps to testing for the presence of a parasitic depict are non complicated. However, in that location is a general social club to the procedure that assists in achieving accurate measurements and preventing damage to your meter or blown meter fuses.
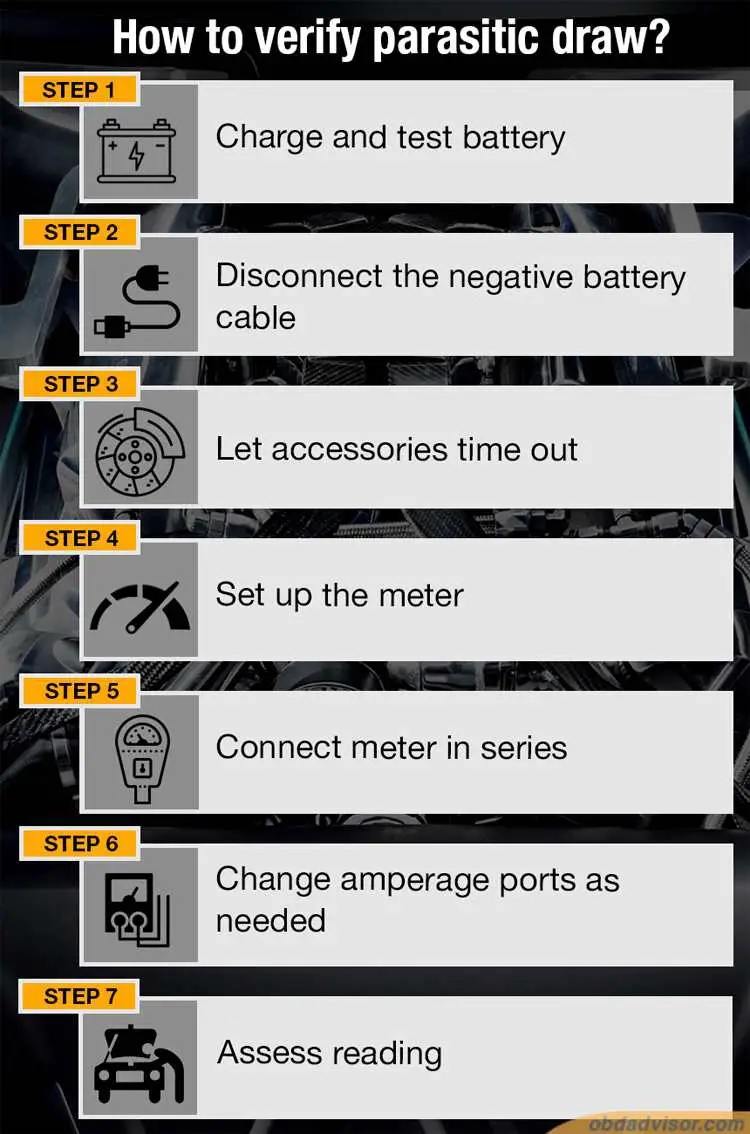
Step#1 – Charge and test battery
Begin the testing process by checking your battery's status, which you lot tin achieve best past charging your battery using a battery charger. Afterwards your battery has been allowed adequate fourth dimension to accuse, use an in-vehicle bombardment charger to test the battery's condition. It is essential to validate that your battery has a resting, fundamental off voltage of at least 12.6 volts and that no other forms of internal battery impairment such as bad cells exist. Alternatively, if you do not take access to a battery tester, virtually automobile parts stores will conduct a courtesy check for you upon request.
Stride#two – Disconnect the negative battery cable
Once you lot accept verified that your battery is in satisfactory operating condition, you volition disconnect your negative bombardment cable from the vehicle's battery. While yous tin deport testing at the positive cablevision, we practise not advise this, every bit any contact with a vehicle ground tin pb to a brusk condition.
Pace#three – Let accessories time out
Y'all will now let the vehicle sit undisturbed for a duration of fourth dimension to permit all power accessories and modules to "fourth dimension out," allowing for accurate testing to occur in the same weather condition as would exist present every bit a vehicle sits for an extended menses. The exact length of time required for all electrical components to time out varies from one vehicle to the next. Consult vehicle-specific service literature to obtain details regarding the necessary wait times for your car.
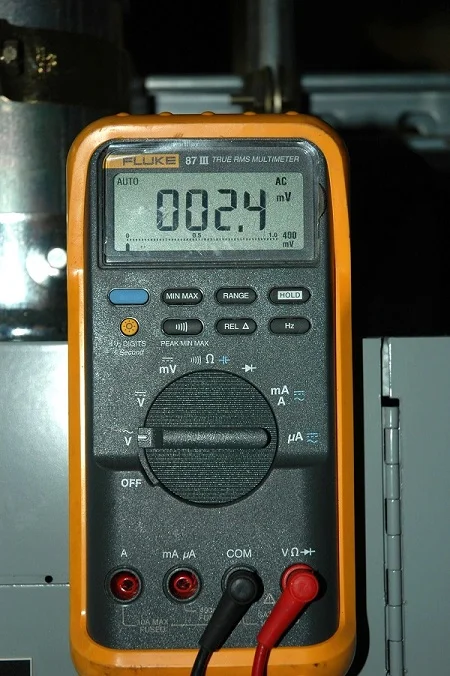
Step#4 – Set up the meter
Before conducting actual testing, y'all must get-go adequately set your digital multimeter. Make sure that your black negative atomic number 82 is in the ground port on the meter. Arrange your red positive lead and so that it connects to the amps port. You will e'er desire to beginning with your red atomic number 82 in the amp port, as opposed to the milliamp port, because this volition forestall meter damage or blown fuses, should the draw be likewise excessive. Next, plough your meter's dial and so that information technology is set to the amps setting.
Footstep#5 – Connect meter in serial
You volition now connect the leads of your meter in serial between the negative post on the battery and the end of the negative battery cable, which substantially makes the meter an active part of your vehicle's circuitry to appraise draw.
Step#6 – Change amperage ports as needed
Suppose your digital multimeter shows no reading at this point in the testing. In that case, y'all volition need to move your ruby atomic number 82 from the amps port to the milliamps port on your meter, which allows you lot to detect lower thresholds of a current draw that might not accept registered on the previously used standard amp setting.
Step#7 – Appraise reading
You lot will now appraise your findings. Your reading is to be used to compare confronting acceptable current depict ratings for your vehicle. Although most vehicles will specify their ain detail acceptable current draw thresholds, anything above l milliamps of the current draw is mostly considered excessive and will bleed a bombardment during prolonged sits.
Diagnosing the source of a parasitic draw
In one case yous have verified the presence of a parasitic depict, you must conduct further testing to diagnose the draw's source, which you can accomplish in three easy steps.
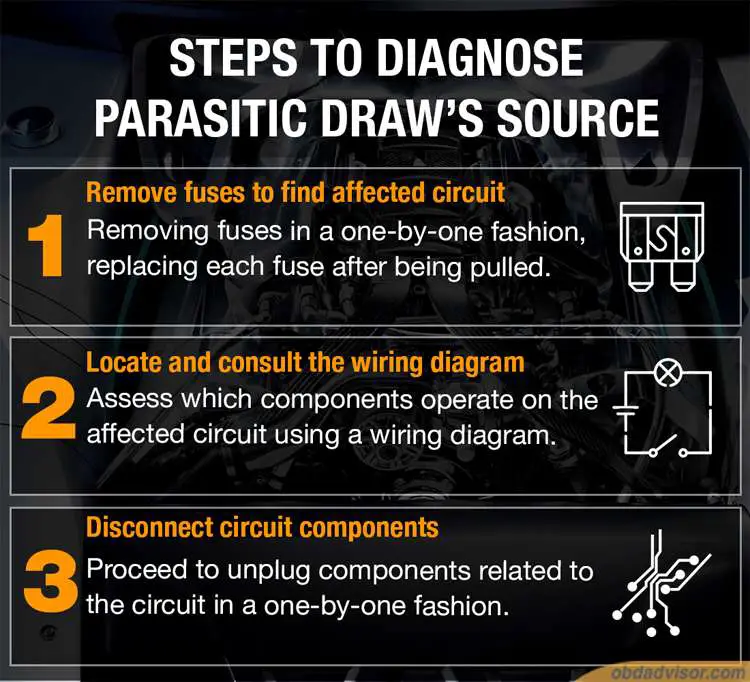
Step#1 – Remove fuses to discover affected circuit
You lot will now need to locate the circuit from which your current draw is originating. Yous can accomplish this by removing fuses in a ane-past-one fashion, replacing each fuse after being pulled. As you lot pull each fuse, yous will be studying your meter to run into if the excessive amperage reading drops out. One time you locate the fuse, that when pulled, drops the draw to an acceptable level, you will have found the affected circuit.
Many vehicles accept multiple fuse boxes, with some located in the interior of the car. Before proceeding to pull fuses from an interior fuse box, you lot volition first want to disconnect your multimeter exam leads from their signal of contact, which prevents spiking amperage from damaging your meter as dome lights and accessories activate upon opening the door. Depress the plunger that facilitates dome light activation with tape or a block of woods lightly clamped into the door jam. Once a suitable time out period has been allowed, you can resume testing.
Step#two – Locate and consult the wiring diagram
You at present must assess which components operate on the affected circuit, which yous can achieve using a wiring diagram. Diagrams can exist located on the Cyberspace by various means, including All Data and Mitchell On-Demand. Once you accept plant a wiring diagram, you will need to report all switches, accessories, and other components tied to the excursion in question carefully.
Pace#iii – Disconnect excursion components
First, ensure that you lot've moved all switches on the affected circuit to the off position. If there'due south no alter in amperage readings on your digital multimeter, you will go on to unplug components related to the circuit in a ane-past-ane fashion. Equally yous unplug each part, advisedly study your meter for any fluctuation in amperage. This process will continue until there's an amperage drop in a detail component's disconnection. One time you have made this observation, replacement of the part in question is warranted to rectify your vehicle'due south parasitic draw status.
Common sources of parasitic depict
Although thorough testing using the above-outlined procedure is advisable, specific components display a historical tendency as conventional sources of the parasitic depict, thus warranting careful consideration if y'all've noted such a draw. The following are some examples of these common sources of the parasitic depict.
- Alternators (Bad Diode),
- Radios,
- Hood Lights,
- Torso Lights,
- Glove Box Lights,
- Alarms,
- Aftermarket Stereo Systems.
Parasitic draw solved
If you lot seem to have repeated issues with your vehicle refusing to crank after sitting overnight, featherbed anxiety that comes with such an inconvenience, and diagnose your upshot step by step. Although information technology can exist frustrating when your vehicle exhibits the symptoms of a parasitic draw, with the use of quality testing tools and an afternoon under the hood, y'all can have your car back to cranking with reliability.
Read More: Multimeters User Manuals for Complimentary Download

How To Do A Draw Test With A Multimeter,
Source: https://www.obdadvisor.com/parasitic-draw-test/
Posted by: boedingtorned1980.blogspot.com
0 Response to "How To Do A Draw Test With A Multimeter"
Post a Comment